Over half of American RV owners report unexpected maintenance issues each year, highlighting just how vital it is to prepare before hitting the road. Whether you are planning a cross-country adventure or a weekend escape, having the right maintenance routine can make all the difference. This guide breaks down the key steps every American traveler should follow for smoother, safer, and more enjoyable RV journeys.
Table of Contents
- Step 1: Gather Essential Maintenance Tools and Supplies
- Step 2: Inspect Exterior Components for Damage or Wear
- Step 3: Check Interior Systems and Appliances
- Step 4: Test Electrical and Plumbing Connections
- Step 5: Verify Safety Devices and Finalize Checklist
Quick Summary
| Key Point | Explanation |
|---|---|
| 1. Organize Your Toolkit | Assemble essential tools and supplies for quick repairs and routine maintenance while traveling with your RV. |
| 2. Inspect Exterior Components Regularly | Perform thorough checks on the RV’s roof, seals, and exterior to prevent costly damage from wear and water leaks. |
| 3. Check Interior Systems Thoroughly | Ensure all appliances, electrical systems, and safety devices function correctly, enhancing comfort and safety while traveling. |
| 4. Test Electrical and Plumbing Connections | Regularly verify the condition of your RV’s electrical and plumbing systems to prevent breakdowns and ensure reliability on the road. |
| 5. Use Safety Checklists Consistently | Create and utilize master checklists to ensure all safety devices are functioning and your RV is ready for safe travel each trip. |
Step 1: Gather Essential Maintenance Tools and Supplies
Preparing for smooth RV maintenance starts with assembling a comprehensive toolkit that helps you tackle unexpected repairs and routine upkeep. The RV Industry Association’s first-timer toolkit recommends having a well-organized collection of tools and supplies that can handle most common maintenance challenges on the road.
Your RV maintenance toolkit should include several key categories of equipment. Start with basic hand tools like adjustable wrenches, screwdriver sets with multiple bit types, pliers, wire cutters, utility knives, and a sturdy hammer. Add precision tools such as multimeters for electrical diagnostics, tire pressure gauges, and torque wrenches. Include safety gear like work gloves, safety glasses, and a headlamp for working in tight spaces. Pack a variety of sealants, electrical tape, zip ties, and spare fuses to address quick repairs. For more extensive work, consider adding a portable air compressor, jack stands, wheel chocks, and a reliable jack suitable for your RV’s weight.
Do not forget to include consumable supplies like motor oil, coolant, transmission fluid, spare light bulbs, and an assortment of fuses. Store these tools in a waterproof, portable container that can be easily accessed during travel. Organizing your toolkit by function and keeping an inventory list will help you quickly locate what you need when maintenance issues arise.
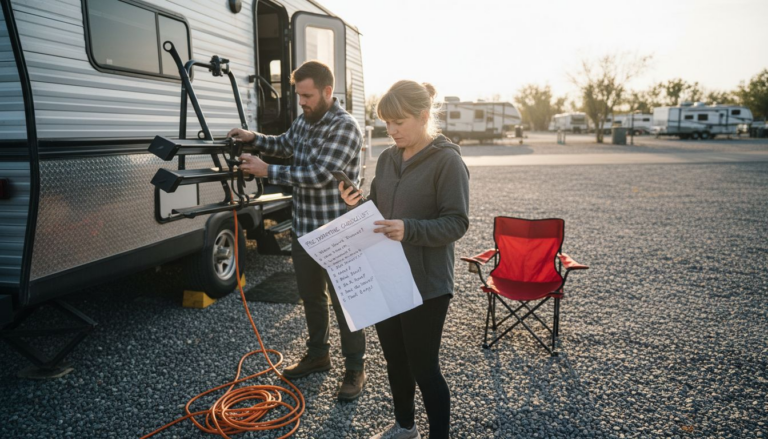
Pro tip: Create a laminated checklist of your maintenance tools and tape it inside your toolkit lid. This visual reminder ensures you never leave behind a critical tool and helps you quickly restock after using an item during repairs.
Consider these tips for maximizing the effectiveness of your maintenance toolkit:
| Tip | Benefit |
|---|---|
| Laminated inventory checklist | Prevents forgetting essential tools |
| Waterproof storage container | Protects tools from weather exposure |
| Organize by category | Saves time during repairs |
| Regular inventory updates | Keeps toolkit fully stocked |
Step 2: Inspect Exterior Components for Damage or Wear
Maintaining your RV’s exterior is crucial for preventing costly repairs and ensuring your home on wheels stays in top condition. Comprehensive maintenance checklists recommend performing a thorough exterior inspection to catch potential issues before they become serious problems.
Start your exterior inspection by carefully examining the RV’s roof. Look for any signs of cracking, punctures, or areas where sealant might have deteriorated. Pay close attention to the roof seams, vents, and around any installed equipment like air conditioners or solar panels. Check the side panels and exterior walls for signs of water damage, hairline cracks, or areas where the gelcoat or paint might be wearing thin. Inspect all window and door seals for signs of wear or potential leaks. Run your hand along the seals to feel for any gaps or areas where the seal might be breaking down. Look at your RV’s exterior trim, awning mechanisms, and attachment points for any signs of rust, corrosion, or loose fittings.
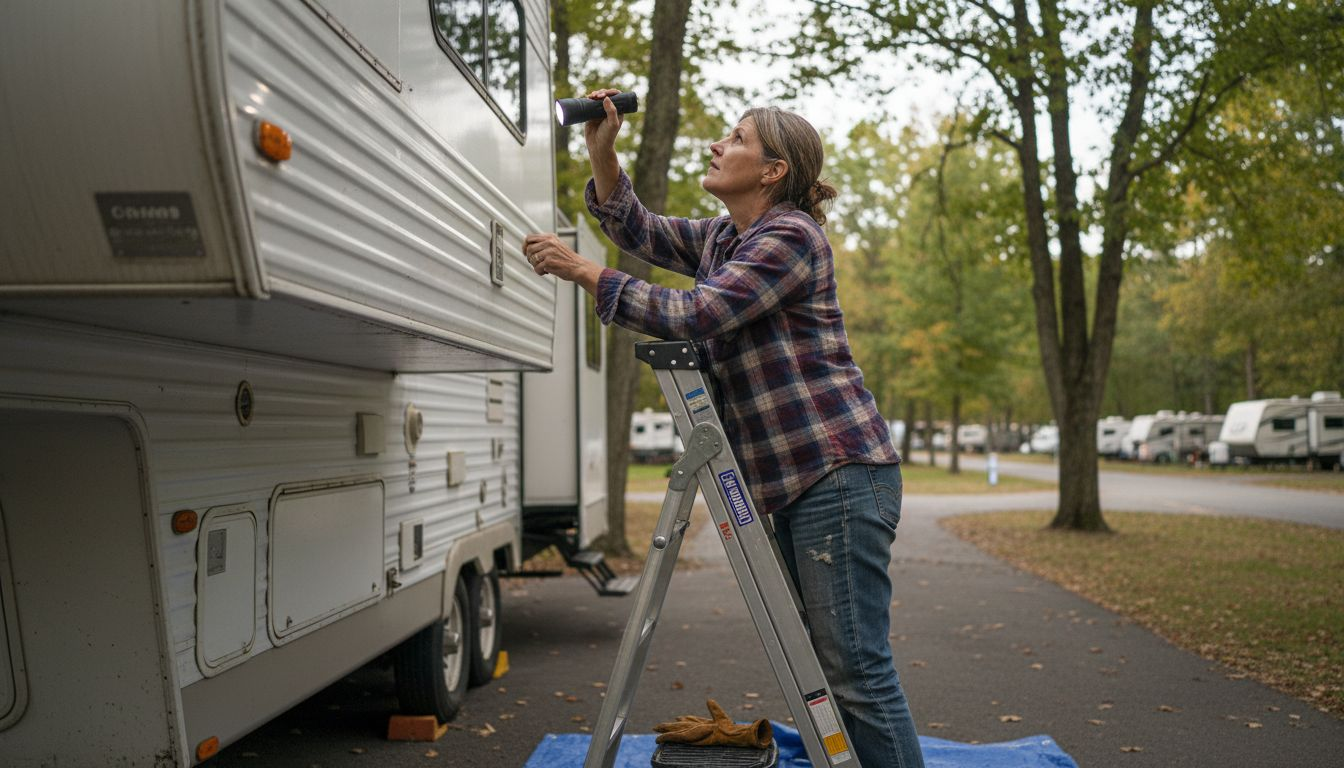
Dont forget to examine the undercarriage of your RV. Check the frame for rust, particularly in areas exposed to moisture or road salt. Inspect suspension components, wheel wells, and axles for signs of wear or damage. Look closely at your tires checking for uneven wear, sidewall cracks, or bulges that might indicate potential failure. Pay special attention to wheel rims and brake components, ensuring they are free from significant rust or structural damage.
Pro tip: Take clear, well-lit photographs of any potential damage during your inspection. These images can help you track changes over time and provide valuable documentation if you need to consult with a professional RV technician or make an insurance claim.
Step 3: Check Interior Systems and Appliances
Ensuring the smooth operation of your RV’s interior systems is critical for a comfortable and safe travel experience. The RV Industry Association’s first-timer toolkit provides comprehensive guidance on maintaining essential RV systems and appliances to prevent unexpected breakdowns during your journey.
Begin your interior systems check by thoroughly examining the electrical system. Test all outlets, light fixtures, and circuit breakers to confirm they are functioning correctly. Verify that your battery connections are clean and secure, and check the charge level of both house and starter batteries. Move on to the propane system by checking for any signs of leaks using a propane detector or soapy water solution on connections. Inspect all gas appliances including the stove, oven, refrigerator, and water heater to ensure they ignite properly and show no signs of damage or corrosion.
Next, focus on the RV’s water and plumbing systems. Inspect water pump functionality, check for any leaks in pipes and connections, and test the water heater. Examine the freshwater tank for cleanliness and potential contamination. Evaluate the condition of your toilet, sink fixtures, and shower components. Verify that all seals are intact and functioning. Test safety systems like smoke detectors, carbon monoxide alarms, and fire extinguishers to ensure they are in proper working condition and have not expired.
Pro tip: Create a digital spreadsheet or take photos of your system checks to track maintenance over time. This documentation can help you identify potential issues early and provide valuable information for professional servicing.
Step 4: Test Electrical and Plumbing Connections
The RV Industry Association’s comprehensive first-timer toolkit emphasizes the critical importance of properly testing and maintaining electrical and plumbing connections to ensure safe and reliable RV operation. Understanding how to methodically check these systems can prevent potential damage and unexpected failures during your travels.
Begin with electrical connections by using a reliable electrical management system or voltage tester to verify campground power sources. Check the pedestal outlet for correct voltage and proper grounding before connecting your RV. Use a surge protector to safeguard your RV’s electrical system from potential power fluctuations. For shore power connections, inspect your power cord for any signs of wear or damage and ensure a secure connection. Test all interior and exterior outlets using a simple outlet tester to confirm proper wiring and functionality.
For plumbing connections, start by examining your water inlet and connection points for any signs of leaks or potential damage. Use a water pressure regulator to protect your RV’s internal plumbing system from high-pressure campground water sources. Connect your fresh water hose securely, ensuring it is specifically rated for potable water. Check all connections for tight seals and potential drips. Inspect your sewer connection by using clean and well-maintained sewer hoses, and verify all connections are tight and leak free. Test each connection point by running water and observing for any unexpected leaks or pressure issues.
Pro tip: Always carry spare electrical adapters and water hose connections. Having backup equipment can save you from unexpected connection challenges and ensure you can quickly resolve any connection issues during your travels.
Step 5: Verify Safety Devices and Finalize Checklist
Routine safety maintenance checklists are essential for ensuring a secure and worry free RV travel experience. The final step in your RV maintenance process involves a comprehensive review of all safety systems and preparing your vehicle for safe travel.
Begin by systematically checking all safety devices throughout your RV. Test smoke detectors and carbon monoxide alarms by pressing their test buttons and verifying that batteries are fresh and functioning. Inspect fire extinguishers to confirm they are fully charged and easily accessible. Check emergency exit windows and doors to ensure they open smoothly and are not obstructed. Verify that your first aid kit is fully stocked with unexpired medications and essential medical supplies. Review your emergency communication devices including cell phone chargers, battery powered radios, and any satellite communication equipment.
Finalize your maintenance checklist by performing a complete walkthrough of your RV. Secure all interior items and ensure drawers and cabinets are firmly closed. Check that external storage compartments are locked and sealed. Verify tire pressure and inspect wheel lug nuts for proper tightness. Review your vehicle registration, insurance documents, and emergency contact information. Make certain that all utilities are properly disconnected and all external connections are stowed correctly. Take a final visual inspection of your RV exterior to confirm no items are left unsecured and all systems appear ready for travel.
Pro tip: Create a laminated master checklist that you can use and reuse for each trip. Keeping this checklist in an easily accessible location will help you consistently perform thorough safety checks and reduce the chances of overlooking critical maintenance steps.
Here’s a helpful summary comparing the major areas of RV maintenance covered in each step:
| Maintenance Area | Key Focus | Why It Matters |
|---|---|---|
| Tools & Supplies | Organized toolkit | Enables fast repairs |
| Exterior Inspection | Roof, seals, body | Prevents costly damage |
| Interior Systems | Appliances, safety | Ensures comfort & safety |
| Connections | Electrical, plumbing | Prevents breakdowns |
| Final Safety Checks | Devices, checklists | Secures safe travels |
Experience Worry-Free RV Travel with Horseshoe Ridge RV Resort
Keeping your RV in top shape is essential for a smooth and safe journey. The article highlights common challenges such as monitoring exterior wear, testing electrical and plumbing systems, and verifying essential safety devices before hitting the road. Many RV owners share the goal of avoiding unexpected breakdowns while enjoying comfort and peace of mind during their travels.
At Horseshoe Ridge RV Resort, we understand these needs and offer a luxurious and perfectly located retreat in Wimberley, Texas. After completing your detailed maintenance checklist you can relax and recharge in our resort with amenities like a large pool, spa-like bath house, and spacious outdoor areas. Whether you seek a transient stay or plan an extended visit, our community is designed for both comfort and convenience. Take the first step toward an effortless RV experience by booking your stay today. Explore all our offerings including cozy cabins and monthly stays to complement your RV adventures at Horseshoe Ridge RV Resort.
Make your next trip stress free by ensuring everything is in working order and pairing that with a stay at a resort that treats you like family. Secure your spot now for a blend of thorough preparedness and unforgettable hospitality.
Frequently Asked Questions
What essential tools should I include in my RV maintenance toolkit?
To prepare for RV maintenance, include basic hand tools like wrenches, screwdrivers, pliers, and a hammer. Additionally, add precision tools such as multimeters and tire pressure gauges, and store them in a waterproof container for easy access during repairs.
How do I conduct a thorough exterior inspection of my RV?
Begin by checking the roof for cracks and sealant deterioration, then examine the walls for water damage. Inspect window seals, the undercarriage, and tires for any signs of wear or damage to ensure your RV remains in optimal condition.
What steps should I take to check the interior systems of my RV?
Start by testing all electrical outlets and checking battery connections for security and cleanliness. Next, inspect gas appliances for proper ignition and leaks, and evaluate the plumbing systems for leaks and proper functionality.
How can I ensure electrical and plumbing connections are safe for use?
Verify campground power sources with a voltage tester to ensure safe connections. Additionally, check all plumbing connections for leaks and secure fittings, using a water pressure regulator to prevent potential issues during use.
What safety devices should I check before hitting the road with my RV?
Test smoke detectors, carbon monoxide alarms, and fire extinguishers to confirm they are in good working condition. Additionally, ensure your first aid kit is stocked and that all emergency exit routes are clear and functional.
How can I create an effective maintenance checklist for my RV trips?
Develop a laminated master checklist that includes items from each maintenance area. Use this checklist before each trip to ensure thorough safety checks and reduce the likelihood of overlooking essential maintenance.
Recommended
- Ultimate Checklist for RV Travel: Prep to Arrival Guide
- 10 Must-Have RV Camping Essentials for Your Trip | Horseshoe Ridge RV
- Camper Packing Checklist for Texas Hill Country RV Trips
- Essential Checklist for Extended RV Trips: Travel Smart | Horseshoe Ridge RV
- 纳米比亚自驾游指南:六个步骤的独特冒险 – 纳米比亚奢华野生动物园 | 今天就预订您的2025/2026年冒险